Friday, November 25, 2011

Painting the Maiden Ship Pt. 6 - the Maiden Voyage gets its first ride!

The Maiden Voyage has departed on its first ride...

"Like butter melting on a warm piece of toast, I set about the first ride on my first hand built frame. Finally, I thought, a frame that actually fits me."


I was nervous as I kicked up my leg and mounted the seat for the first time. All of the necessities were there. Wheels, drive train, steering, brake, seat. All the components tightened down, but creaking like they do when not yet fully adjusted. 
   The first few rotations of the pedals made me feel more confident, and I checked my position from the bars to seat, seat to pedals. I let my mind fully take in the experience. Then, I felt it. Like butter melting on a warm piece of toast, I set about the first ride on my first hand built frame. Finally, I thought, this is it. I'm riding a frame that actually fits me.

 the lesson:
Months of hard work, money, time, and skill can pay off.

  Here's a quick timeline 
August - Built Frame at UBI, September - medical leave,  
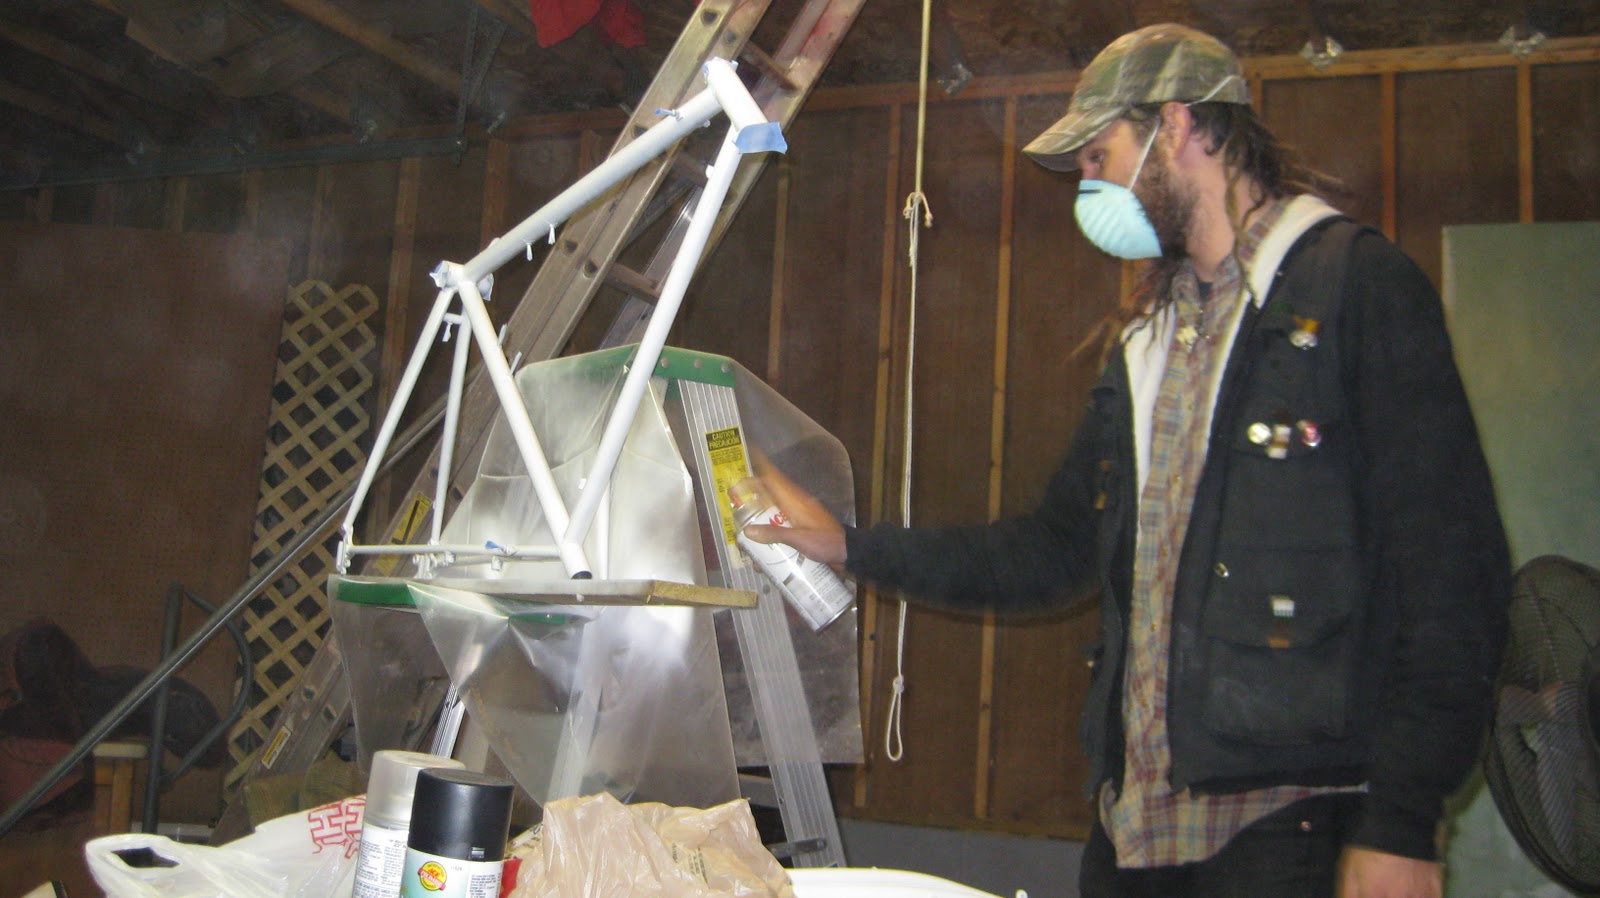
October - Painted and Decal'd the Maiden Voyage,  
November - Pieced together steering, brakes, and drive train.

As you can see, it is currently set up as a Single Speed Track-Style bike for fast city riding. Its fast. A versatile frame, if you will.

   I decided to slowly piece it together, partially from laying low and recovering from surgery, which also meant no work, no income. Chris from UBI hooked me up with a sweet Campy seat post, and I bought an adjustable stem at UBI for touring. The wheels I found in an alley near the Seward Co-op. The fork, headset, and front brake were bought used from the Hub Bike Co-op. The handlebars and brake lever were from Alex's old bike. The Seat, Crank, BB, Pedals, Chain, Seat, Rear brakes all came from an old parts bin that Beard at the Hub had put together for donating. Mad thanks to Beard & the HUB!

When I get back to the collective bike shop at the farm in Florida, hopefully by early December, I'll have more tools, parts, and time to gear up. yay!

AND; As I deck the Maiden Voyage out with sweet touring gear, I'll be sure to post updates!!
Thanks for following! Oh, and I think I'll be welding my own front rack so be sure to check back...

Parts list: Splined BB, Generic Cranks, Z Chain, Generic J Brakes, Aluminum Handlebars, Campagnolo Seat Post, Cane Creek Headset; Adjustable Stem, basically it's all pretty generic for now.

Tuesday, November 15, 2011

Painting the Maiden Ship Pt. 5 - Finished It!

The MAIDEN VOYAGE is ready!

   Well, for now that is.

   I'm not super-stoked on the paint job, and not sure of how long it will hold up, but, I'll find out, and keep posting. I'm sure once I have more experience, I'll go back and repaint it better. But for now, It's perfect.

   I took it into the Creative Ironworks metal shop in SE Minneapolis, a big shop that is facilitated by Chris Dunn. It is a huge well ventilated room with paint hooks hanging from the rafters.

   First, I set out my my test tube, lightly buffed half of it, and applied the final coat of paint to see how it would set. It set perfectly, smooth and glossy. So,time to move on...
   

   After lightly buffing most of the bike with a fine sandpaper, the final coat was reapplied. Most of it came out okay, but there were still some spots that still looked like reptile skin. I buffed them a little more after they dried a little and repplied, but it didn't change the fact that it just orange peeled again as soon as I reapplied the paint.

   I really have no idea why it kept doing shrinking, but I pushed through it anyways.

   At some point I decided that it was more important to finish the paint job, perfect or not, so I could assemble and ride it as soon as possible . I mean, I made it, I should be riding it, right? So here it is, ready to assemble, then, RIDE!

Thursday, October 13, 2011

Painting the Maiden Ship Pt. 4 - F-d Up the paintjob!

At last, the final coat of paint!
   Excitement gathered, and prepped myself for the grand finale of spraying, but - things went horribly wrong. As I applied a medium mist, it looked a little grainy, then as it dried, shrunk and crackled! My tough glossy outer protective coat was a reptiley mess!

   "Orange Peel" is appearently the term for the problem I was having. Could it be I made a mistake choosing the types of paint? Was it too humid? Too hot? Cold?

   Frantically researching (and trying really hard not to panic about my f-d bike) I came to the this conclusion for my malefaction:

   Lacquers are easy to use because the dry almost immediately.The first layers are not very protective, but a base coat of color to be sealed in with a clear outer coat. You can apply as many layers as you wish, the more layers (to a point) the more protection. The re-coating period is the issue here.

Lacquers have a Re-coat period as follows:
-Apply first layer, let try (5-10min)
-RE-COAT within 2 hours to maintain consistent layering.
-After the 2 Hour period passes, you must wait 36-72 HOURS to let those layers cure and apply the next layers! If you apply lacquer between this window, It will eat away at the old, not yet cured layers, and 'shrink'
it into an orange peel looking mess!

How to fix the problem?

   At this point, all you can do is sand of the bad lacquer, and reapply it. Make sure you let it dry before sanding, and wait to reapply the color after the paint that may be left on cures completely, or your gonna have more sanding to do.

This is is where I left off, so this is where I will leave you until the next chapter; (hopefully) the final (fixed) finished paint job...
TBC...

Saturday, October 8, 2011

Painting the Maiden Ship Pt. 3 - Decals

Decals:
After doing a little research on decals, I settled for a local shop - Budget Sign and Printing in St. Paul. The set me up with a vinyl that they said they've used in the past for bike decals, a white background digital printed deal.
 I went in with the order and had 3 sheets printed for within 15 min. for only $25. I also looked at other options for the future, die cut vinyl, etc. but settled on this option and cutting them myself for now.


CUTTING
the decals was easy enough, i just set up with an exacto knife and cut around the bleed outline i left on the image so it would blend w/o a white outline.
 I cut each into a smaller rectangle to make the precision cutting easier, then followed the outlines, only cutting through the vinyl and leaving the backing.

After that was finished, I put a thin piece of masking tape over the lettering to hold them all in place.
 Next, peeling the backing away, I carefully set one side in place and ran my fingers down the sticker until it was evenly applied, then peeled away the excess and the masking tape, leaving a beautifully placed, even, and airtight decal sticker. So far its looking great.

Final Clear Coating TBC...

Saturday, October 1, 2011

Painting the Maiden Ship Pt. 2

Day 2: Adding some color
  After the primer was allowed to cure overnight, I started with the first coat of color - black lacquer. Layering is very important when using any spray paint, but especially lacquer.

   The best way to get started is with a light misting, making sure you keep moving and hit every area, then repeat until the primer is completely coated. Lacquer dries quickly, so you can keep moving around and by the time you hit each surface of the frame, the area you started should be dry enough to re-coat. Lacquer can be sanded down after it completely dries, so if you really screw up, just stop and go back to it later after a light sanding.


After a first coat, I let it dry overnight.
Next, I'll work on getting decals printed.
TBC... 
Half Primer & Half First Coat

Tuesday, September 27, 2011

Painting the Maiden Ship Pt. 1

The Maiden cleaned and ready to paint
After doing a little research on the possibilities of the different types of spray paints one could use to coat a raw bike frame, here's what I picked:

-[White] Enamel Primer; bonds to porous metal creating a protective base coat for color and outer coats.
-[Black] Color Lacquer; Provides a thick layer of color that hardens into a solid protective layer
-Clear Coat Lacquer; Provides an outer hardened layer to protect from scratches, and protects and seals in multiple colors/decals etc.
 note: I read that lacquer primer sux and you can paint lacquer over enamel but not vise-versa, also that lacquers have been used to paint cars and motorcycles reliably for years. always clear coat the outer layer...

First, I took an old tube, cleaned it up and did some test patches with the paints I picked, let them dry, and did scratch tests. The coating seemed promisingly scratch resistant and durable, so I went for it.

   As instructed; starting with 150 grit sand paper or emery cloth, sand entire frame of rust and debris. Re-sand lightly with 220 grit. Clean entire frame with a lint-free rag wet with rubbing alcohol to remove any chemical and grease debris. let alcohol completely evaporate in a dry area.


The Maiden Ship all primed up
Next, tape the frame. This protects parts that you don't want painted; inside of seat-tube, head-tube, BB, braze-ons, etc. I rolled up little cones made from small pieces of tape to plug the braze-ons.

Now the frame is ready for primer; I simply set the frame on a board on the shelf of a ladder so it was about chest high. that gives a good close-up view of the frame to check for spots that may need more paint.

Keep the can at about a foot away and keep moving while you spray in order to decrease the risk of getting spots that accumulate paint to fast and run. if you do, you can quickly wipe it and recoat more slowly, or sand it later. Let it dry (~10 min) and flip it and cover every visible surface.

I let the primer dry over night to ensure it would be cured and ready for the lacquer topcoats. Next, I used the Black lacquer to paint the used uni-crown fork (after cleaning and priming of course) i picked up at the HUB. It looks so good, I can't wait to get to the frame!

to be continued...